Saturday 31 January 2015

PTU Love Valentine
This tutorial was written by me on January 31, 2015.
It was made out of my own creation and any similarity is purely
coincidental.
I used PSP X6 but any version would work.
Artist: Keith Garvey
I bought this tube at PTE (no longer in business)
Do not use these tube(s)
unless you have a license.
Mask: WSL 84 HERE
Let’s start with the mask layer:
New Raster – 800 X 800.
Open Paper 10. Open mask (WSL 84) and minimize.
SELECTIONS – SELECT ALL – Copy and paste Paper 10 into selection.
Go to LAYERS – NEW MASK LAYER – FROM IMAGE – SOURCE LUMINANCE - CHECKED – from menu, find WSL 84 – OK. Merge group.
Duplicate and merge down. Re-size 115%.
(see tag for placement)
(see tag for placement)
Now onto some elements:
Element 106 - C/P and move to lower left side of tag. Make sure this layer is UNDER the frame layer(s). Duplicate and move to right side of tag.
Element 37 - C/P and re-size 75%. Move to bottom middle of frame. Free rotate 5º left.
Make sure this layer, and all other layer(s), are OVER the frame layer(s).
Element 48 - C/P and re-size 30%. Move to bottom middle(ish) of tag.
C/P the second tube (Tube 2), if your gonna use two different ones. Move her to the bottom left corner of the tag.
(see tag for placement)
I've used
V & H 2
Opacity 70
Blur 7
Color Black
Now you can add name
and © information. Save as .png and re-size if you wish.
I re-size before I add
name and © info and then save.
Let me know what you think of
this tutorial.
Friday 30 January 2015

PTU Serenity Trapped
This tutorial was written by me on January 30, 2015.
It was made out of my own creation and any similarity is purely
coincidental.
I used PSP X6 but any version would work.
Artist: Dirk Richter
I bought this tube at Creative Design Outlet HERE
Do not use this tube
unless you have a license.
Scrap Kit: ScrapHH_IB-DirkRichter-14-3 by Hungry Hill
You can find this kit at Creative Design Outlet HERE
You can find this kit at Creative Design Outlet HERE
Mask: WSL 3 & 84 HERE
Let’s start with the mask layer:
New Raster – 800 X 800.
Open Paper 2. Open mask (WSL 3) and minimize.
SELECTIONS – SELECT ALL – Copy and paste Paper 2 into selection.
Go to LAYERS – NEW MASK LAYER – FROM IMAGE – SOURCE LUMINANCE - CHECKED – from menu, find WSL 3 – OK. Merge group.
Duplicate and merge down.
New Raster Layer. Open Paper 4. Open mask (WSL 84) and minimize.
SELECTIONS - SELECT ALL - Copy and paste Paper 4 into selection.
Go to LAYERS - NEW MASK LAYER - FROM IMAGE - SOURCE LUMINANCE - CHECKED and from the menu, find WSL 84 - OK. Merge group. Duplicate and merge down. Re-size 115%.
(see tag for placement)
(see tag for placement)
Now onto some elements:
Deco - C/P and re-size 85%. Leave it in the middle of the tag. Make sure this layer is UNDER the frame layer(s).
Crystal Spray - C/P and re-size 75%. Move to left side of frame over the vine. Duplicate and mirror.
Keys - C/P and re-size 50%. Move to the top middle of the column.
C/P the full version of the tube. Mirror and move her to the bottom left corner of the tag.
(see tag for placement)
I've used
V & H 2
Opacity 70
Blur 7
Color Black
Now you can add name
and © information. Save as .png and re-size if you wish.
I re-size before I add
name and © info and then save.
Let me know what you think of
this tutorial.
Monday 26 January 2015

PTU Winter Bird
This tutorial was written by me on January 25, 2015.
It was made out of my own creation and any similarity is purely
coincidental.
I used PSP X6 but any version would work.
Artist: Di Halim
I got this tube as a gift from Pics For Design HERE
You can find this tube, if you join the Exclusive Club, but any tube will do.
Do not use this tube
unless you have a license.
Mask: WSL 84 HERE
Let’s start with the mask layer:
New Raster – 800 X 800.
Open Paper 14. Open mask (WSL 84) and minimize.
SELECTIONS – SELECT ALL – Copy and paste Paper 146 into selection.
Go to LAYERS – NEW MASK LAYER – FROM IMAGE – SOURCE LUMINANCE - CHECKED – from menu, find WSL 84 – OK.
Duplicate and merge down. Re-size 115%.
(see tag for placement)

Element 21 - C/P and re-size 95%. Move to far left side of tag. Duplicate and mirror. Move original element up just a little on tag.
Element 16 - C/P and move to bottom right corner of tag.
Add drop shadow to layers of your
choosing.
I've used
V & H 2
Opacity 70
Blur 7
Color Black
Now you can add name
and © information. Save as .png and re-size if you wish.
I re-size before I add
name and © info and then save.
Let me know what you think of
this tutorial.
Tuesday 20 January 2015

PTU Gabrielle
This tutorial was written by me on January 20, 2015.
It was made out of my own creation and any similarity is purely
coincidental.
I used PSP X6 but any version would work.
Artist: Spazzd Art
I bought this tube at Spazzd Art HERE
Do not use this tube
unless you have a license.
Mask: MPM 44 HERE
Let’s start with the mask layer:
New Raster – 800 X 800.
Open Paper 10. Open mask (MPM 44) and minimize.
SELECTIONS – SELECT ALL – Copy and paste Paper 10 into selection.
Go to LAYERS – NEW MASK LAYER – FROM IMAGE – SOURCE LUMINANCE - CHECKED – from menu, find MPM 44 – OK.
Duplicate and merge down.
(see tag for placement)
Element 20 - C/P and move to upper left side of tag. Make sure this layer is UNDER the frame layer(s).
Element 30 - C/P and re-size 50%. Place over paper and frame layers but over to the right side of paper layer. Make sure this layer, and all other layer(s), are OVER the frame layer(s).
Add drop shadow to layers of your
choosing.
I've used
V & H 2
Opacity 70
Blur 7
Color Black
Now you can add name
and © information. Save as .png and re-size if you wish.
I re-size before I add
name and © info and then save.
Let me know what you think of
this tutorial.
Friday 16 January 2015
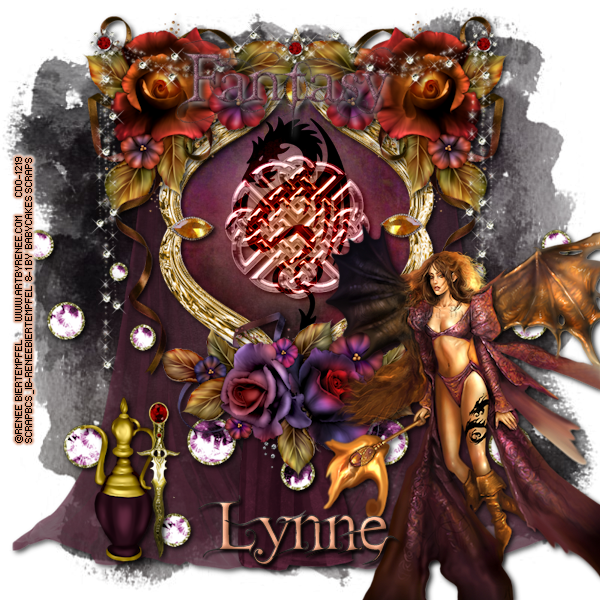
PTU Dragon Magic
This tutorial was written by me on January 16, 2015.
It was made out of my own creation and any similarity is purely
coincidental.
I used PSP X6 but any version would work.
Artist: Renee Biertempfel
I bought this tube at Creative Design Outlet HERE
Do not use this tube
unless you have a license.
Mask: WSL 254 HERE
Let’s start with the mask layer:
New Raster – 800 X 800.
Open Paper 5. Open mask (WSL 254) and minimize.
SELECTIONS – SELECT ALL – Copy and paste Paper 5 into selection.
Go to LAYERS – NEW MASK LAYER – FROM IMAGE – SOURCE LUMINANCE - CHECKED – from menu, find WSL 254 – OK.
Duplicate and merge down.
(see tag for placement)
Now onto some elements:
Element 4 - C/P and move to lower left corner of tag. Make sure this layer is UNDER the frame layer(s). Duplicate and mirror.
Element 3 - C/P and re-size 50%. Move to bottom middle of frame.
Make sure this layer, and all other layer(s), are OVER the frame layer(s).
Add drop shadow to layers of your
choosing.
I've used
V & H 3
Opacity 90
Blur 10
Color Black
Now you can add name
and © information. Save as .png and re-size if you wish.
I re-size before I add
name and © info and then save.
Let me know what you think of
this tutorial.
Subscribe to:
Posts
(Atom)